DIY Hair Extensions

Hair extensions make it possible to enjoy the look of fuller, thicker, longer hair in just hours. However, you really want the look of more voluptuous hair-maybe just for a special night out or maybe even for a week long vacation- and you can't justify spending the hundreds of dollars necessary to get the extension look at your favourite salon. Luckily, with DIY hair extensions, you can get the look you want at a cost you can afford right in the privacy of your own bathroom.
Types of DIY Hair Extensions
Depending on how natural you want your extensions to look and how long you want them to last you have a few choices for DIY hair extensions. For the most natural look and longest staying power you will want to purchase and apply small sections of glue on natural hair extensions. This type of hair extension is more difficult to apply and a bit more costly but the results are worth the extra time and money.If you just want the look of extensions for a special night or if you want to try out the look of extensions without spending a lot of money you have a few relatively easy to use choices- clip in extensions, mini-link extensions and tape on extensions. Clip in extensions feature varying lengths of natural or synthetic hair that has been pre-woven onto tiny hair clips. To apply these extensions simply clip the sections anywhere on your scalp at the root of your natural hair. Application and removal is quick and easy but the extensions can loosen or fall out and the finished look doesn't provide the most natural of all extension choices.
Mini-link extensions offer a more natural look for do-it-yourselfers and come with the added bonus of not requiring any chemicals, heat, glue, or special removers that can cause damage to your natural hair. However, these extensions are more difficult to apply and until you master the technique the results may not look very natural. Small links are used to hold the extensions to sections of your natural hair. To apply these extensions you have to part your natural where you would like to apply the extensions and then, using a special tool you pull a very small section of your hair through the link and a section of extension hair. The link is then squeezed shut to hold the two sections of hair together. To remove the extensions you must us a pincher tool to pry open the link.
Finally, you can opt for tape on extensions for your special occasions. These extensions are secured to an extremely thin piece of material that features double sided tape. To apply you simply part you hair in the area that you want to apply the extension, remove the backing from one side of the tape, press the extension in place, remove the other side of the backing and press the hair above the extensions into place. These extensions are easy to use and last up to four days if applied securely. They also look fairly nature since the strip is very thin and easily concealed by your natural hair.
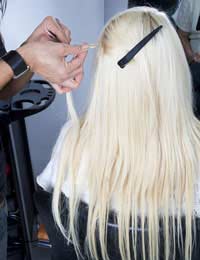
Applying Glue In Hair Extensions
For longer lasting, more natural looking extensions you need glue in extensions. However, these extensions can be quite difficult to apply alone. If you can, try to enlist the help of a friend for the easiest most natural looking application.Glue- in hair extensions come in varying widths so measure the strand before applying and cut it to match the width of you hair- from side to side along the nape of your neck. Next, part your hair as if you were putting it in a half up half down hairdo. Secure the top section and then separate the remaining section starting close to your hairline. Clip unwanted sections out of the way and apply a thin line of glue in a straight line in the resulting hair part. Let the adhesive dry for a second until it becomes tacky to the touch, be very careful not to get the glue on your skin- keep it along the very top pf the hair strands near the root for the best hold. Once the glue is ready apply the hair strand and press down until the extension is secured. Let dry naturally or speed up the process with a blow dryer. Then part the hair about ¼ to ¾ of an inch above the extensions and apply a second strand. Continue the process until you achieve the look you desire.
Whether you want full, long locks for a few hours, or a totally new do for weeks on end DIY hair extensions make getting the hair you always wanted quick easy, and inexpensive.


